miro
Card
Tesenso Integration
1. Overview
The miro Card starter kit contains the following components
-
Raspberry Pi based gateway
-
3 miro Cards
-
Power supply
To run the system and access the measurment data, the gateway needs to be powered up and connected to the internet. Use an ethernet cable to connect the gateway to a network that allows full access to the internet. To access the data use the dash board provided from Tesenso. Follow the sign up guide to get your system live.
The miro Card itself only needs to be exposed to light in order to start working no special setup or activation is needed.
2. Tesenso Dashboard
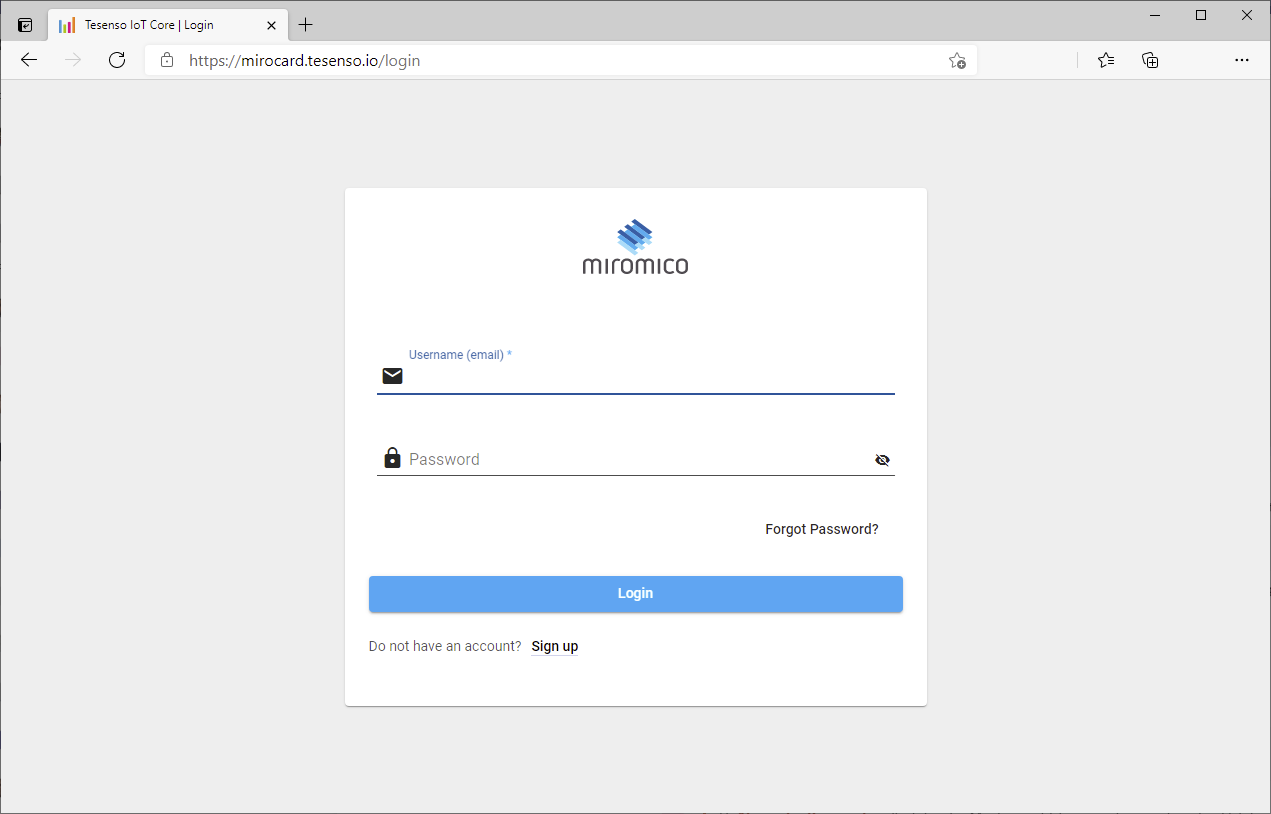
2.1. Sign up
Using a web broweser navigate to your dashboard on https://mirocard.tesenso.io/login. Login with your email and password or sign up for a new account.
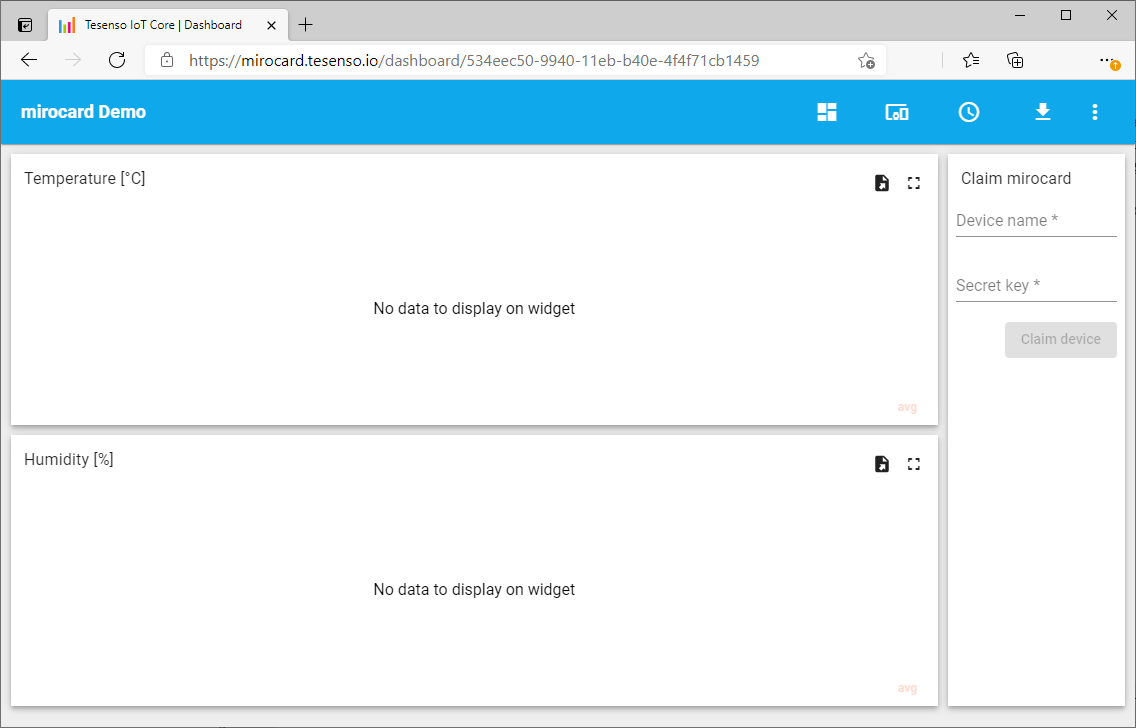
2.2. Claim Devices
Before you can see your devices in the dashboard, you need to claim them. This will assign the device to your account and forwared the data to the dashboard. Use the form in the top right corner of the dashboard to claim your devices one by one.
-
username: Device MAC address
-
password: Secret key
The MAC is found on the label on the back of each device. Specify the MAC address in lower case using ':' as separator (e.g. a1:b1:c2:d3:e4:f5).
The secret key is a 16 digit hex number provided with the evaluation kit. There is one specific key for each device. Please make sure you input the correct key using all lower case letters.
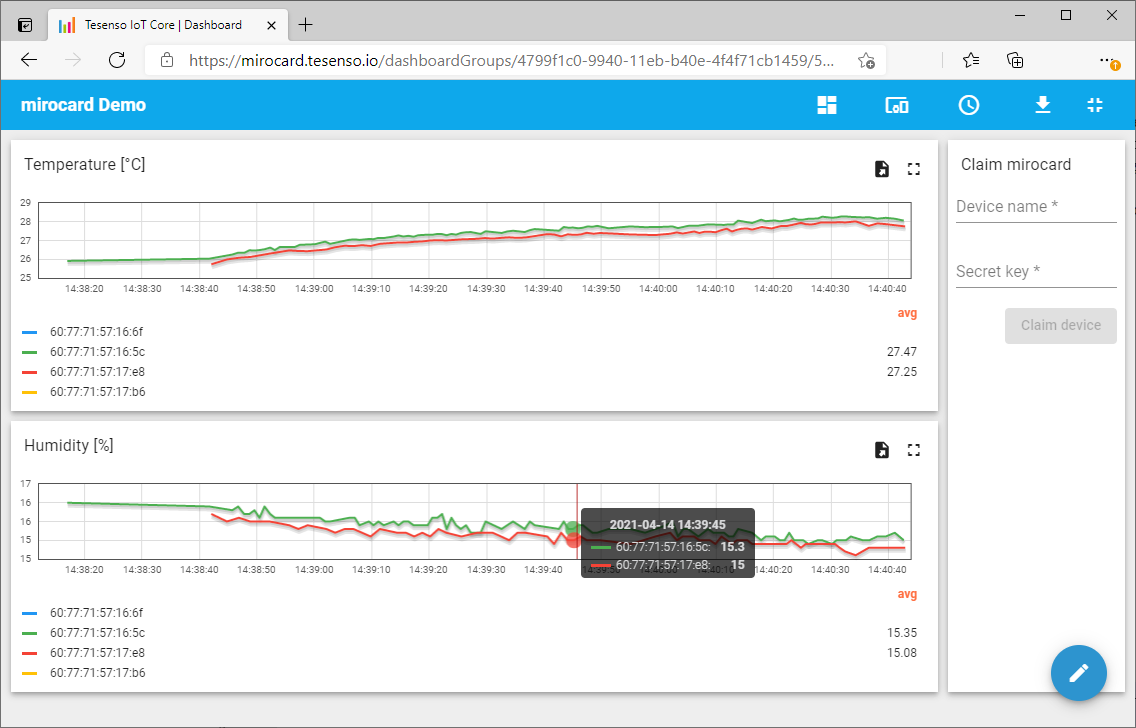
2.3. Watch Incoming Data
Once the devices have been claimed, expose the miro Card(s) to sufficent light and they will start sending. The data will appear in your dashboard. Startup time and data interval of a miro Card mainly depends on the ambient light level. See datasheet for more details.