miro
Edge
Device Configuration
1. Overview
miro Edge gateway can be configured using the integrated web frontend. To access the web frontend an ethernet connection to the gateway has to be established. The ethernet port on the gateway is exposing a small subnet 192.168.100.100/28 and is internally assigned an IP address of 192.168.100.100.
2. Establish Ethernet Connection
To establish an ethernet connection to the gateway the following steps are necessary:
-
Connect the gateway to your computer using a standard ethernet cable
-
Change your computer’s network configuration to assign it an IP address within the 192.168.100.100/28 subnet (e.g. 192.168.100.101)
2.1. Network Configuration in Windows 10
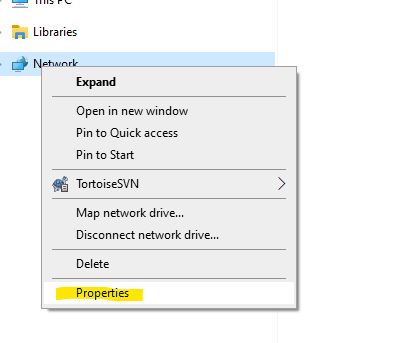
In Windows 10 right-click on Network in explorer and select properties
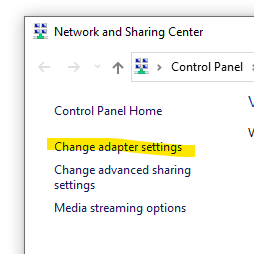
In Network and Sharing Center select Change adapter settings
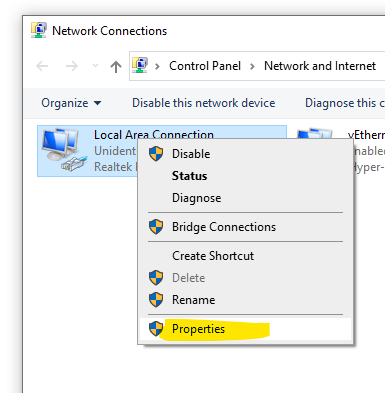
In Network Connections select and right-click your Local Area Connection and select Properties
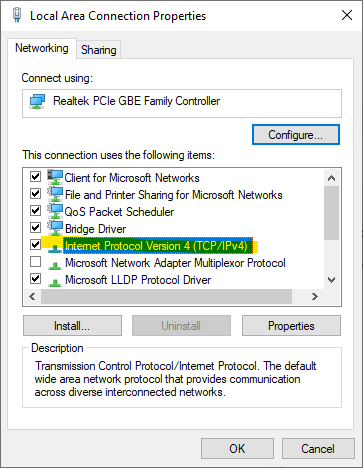
In Local Area Connection Properties select Internet Protocol Version 4 and click the Properties button.
In Internet Protocol Version 4 Properties configure the IP address to set your computer’s IP to 192.168.100.101. Set the subnet mask to 255.255.255.240.
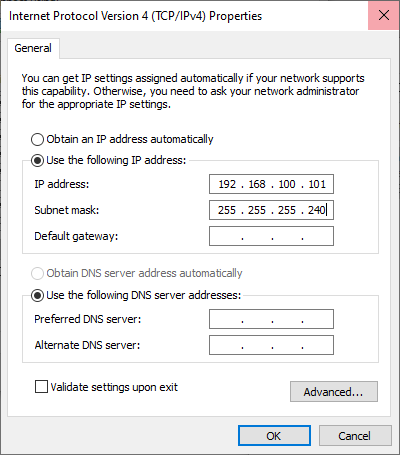
Click Ok and close all open dialogs. Your computer’s network is now connected to the miro Edge gateway.
| Don’t forget to change back your network configuration when you have finished configuring the gateway! |
3. Configuration using Web Fronted
3.1. Login
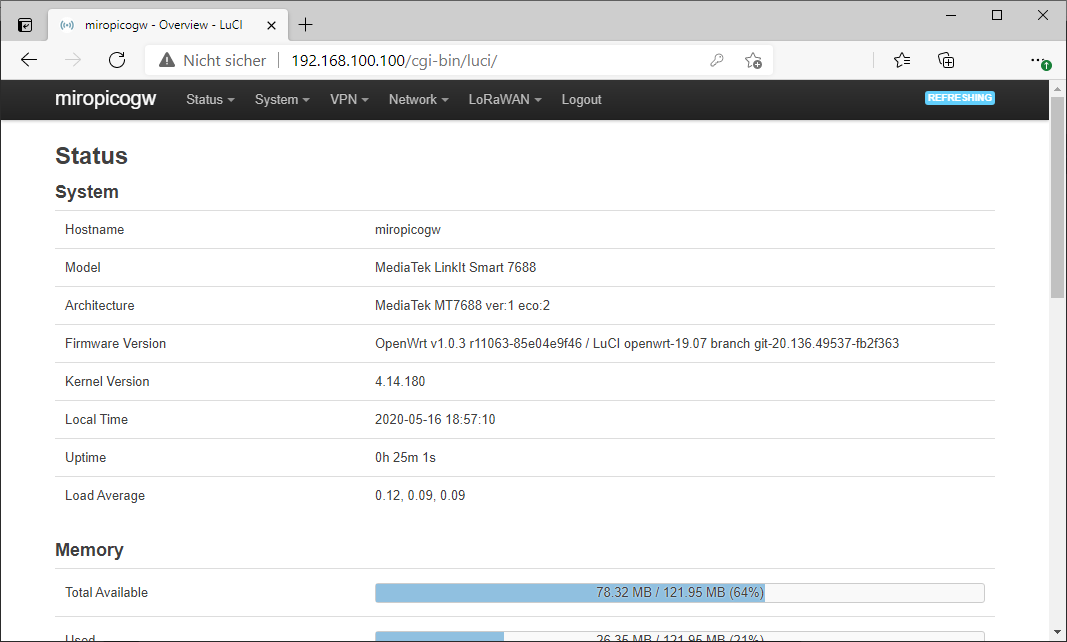
To login access the web frontend of the gateway using your browser. The web frontend is reachable on http://192.168.100.100.
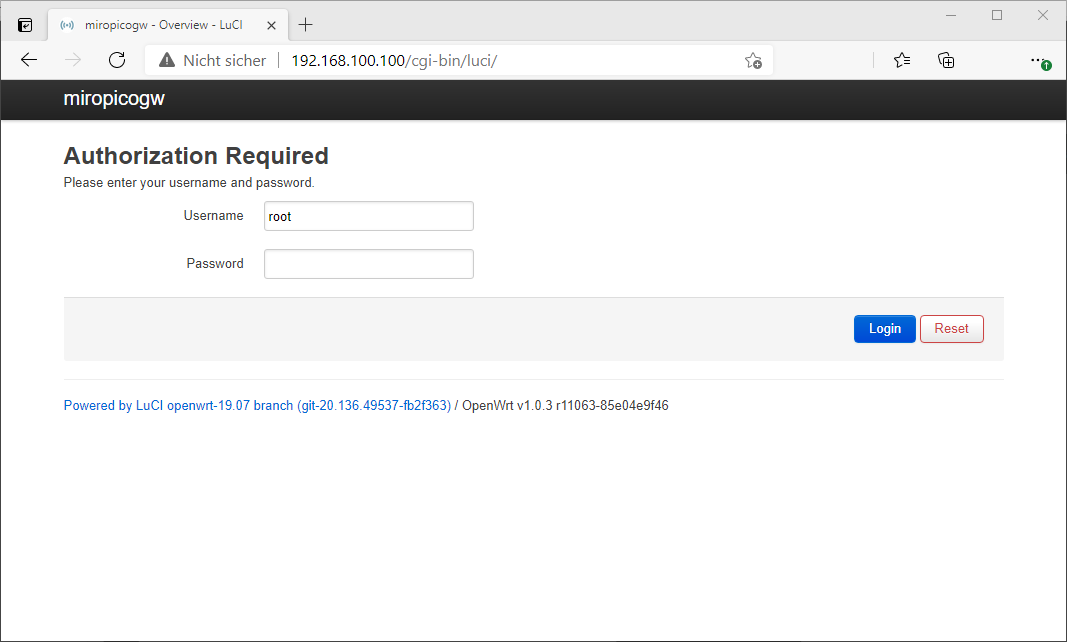
Use the following login credentials
User name |
root |
Password |
miro<mac address> |
Replace the <mac address> part with the last 6 digits of the gateway MAC address. All characters should be in lower case and without the ':'. The MAC address can be found on the label on the back of the housing. E.g if your gateway’s mac address is 7D:B5:B8:55:F6:A5, your password would be miro55f6a5.
| For security reasons, it is strongly recommended to change the router’s default password under System→Administration |
4. LoRaWAN® Settings
The LoRaWAN settings for SubG and 2.4 GHz are slightly different
4.1. miro Edge for SubG LoRaWAN®
The SubG (868 MHz or 915 MHz) LoRaWAN configuration page allows to change all LoRaWAN® specific settings

| Option | Description |
|---|---|
Antenna used |
Select either external (if connected) or internal LoRaWAN antenna. |
Forwarder type |
Select either optimized LORIOT packet forwarder or legacy Semtech packet forwarder of other LNS |
Semtech packet forwarder server address |
Set server address for legacy packet forwarder (e.g. router.eu.thethings.network for TTN EU) |
Semtech packet forwarder port |
Set server port for legacy packet forwarder |
Loriot packet forwarder server address |
Set server address for Loriot packet forwarder (e.g. eu1.loriot.io for EU instance) |
4.2. miro Edge for 2.4 GHz LoRaWAN®
The 2.4 GHz LoRaWAN configuration page allows to change all LoRaWAN® specific settings.
| Up to date LoRaWAN 2.4 GHz is not in the LoRaWAN standard and not widely supported by the network servers. |
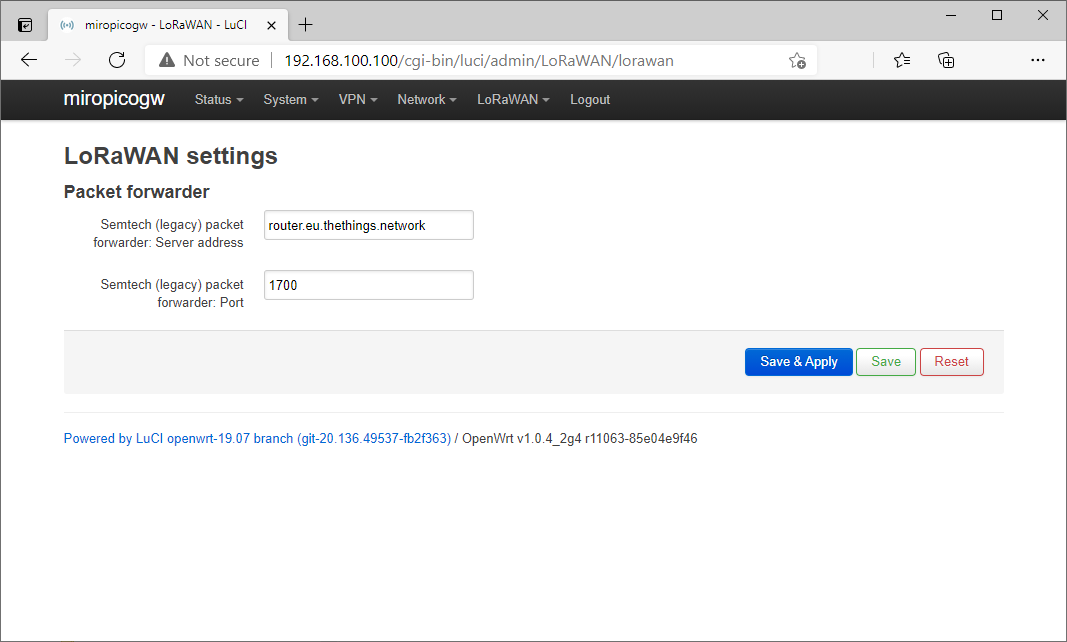
| Option | Description |
|---|---|
Semtech packet forwarder server address |
Set server address for legacy packet forwarder (e.g. router.eu.thethings.network for TTN EU) |
Semtech packet forwarder port |
Set server port for legacy packet forwarder |
