miro
Evaluation Kit for SX1280
P/N: DEV-FMLR-STEVK4
Quick Start Guide

This document provides a step-by-step guide on how to use this board with LoRaWAN®
1. Unboxing
-
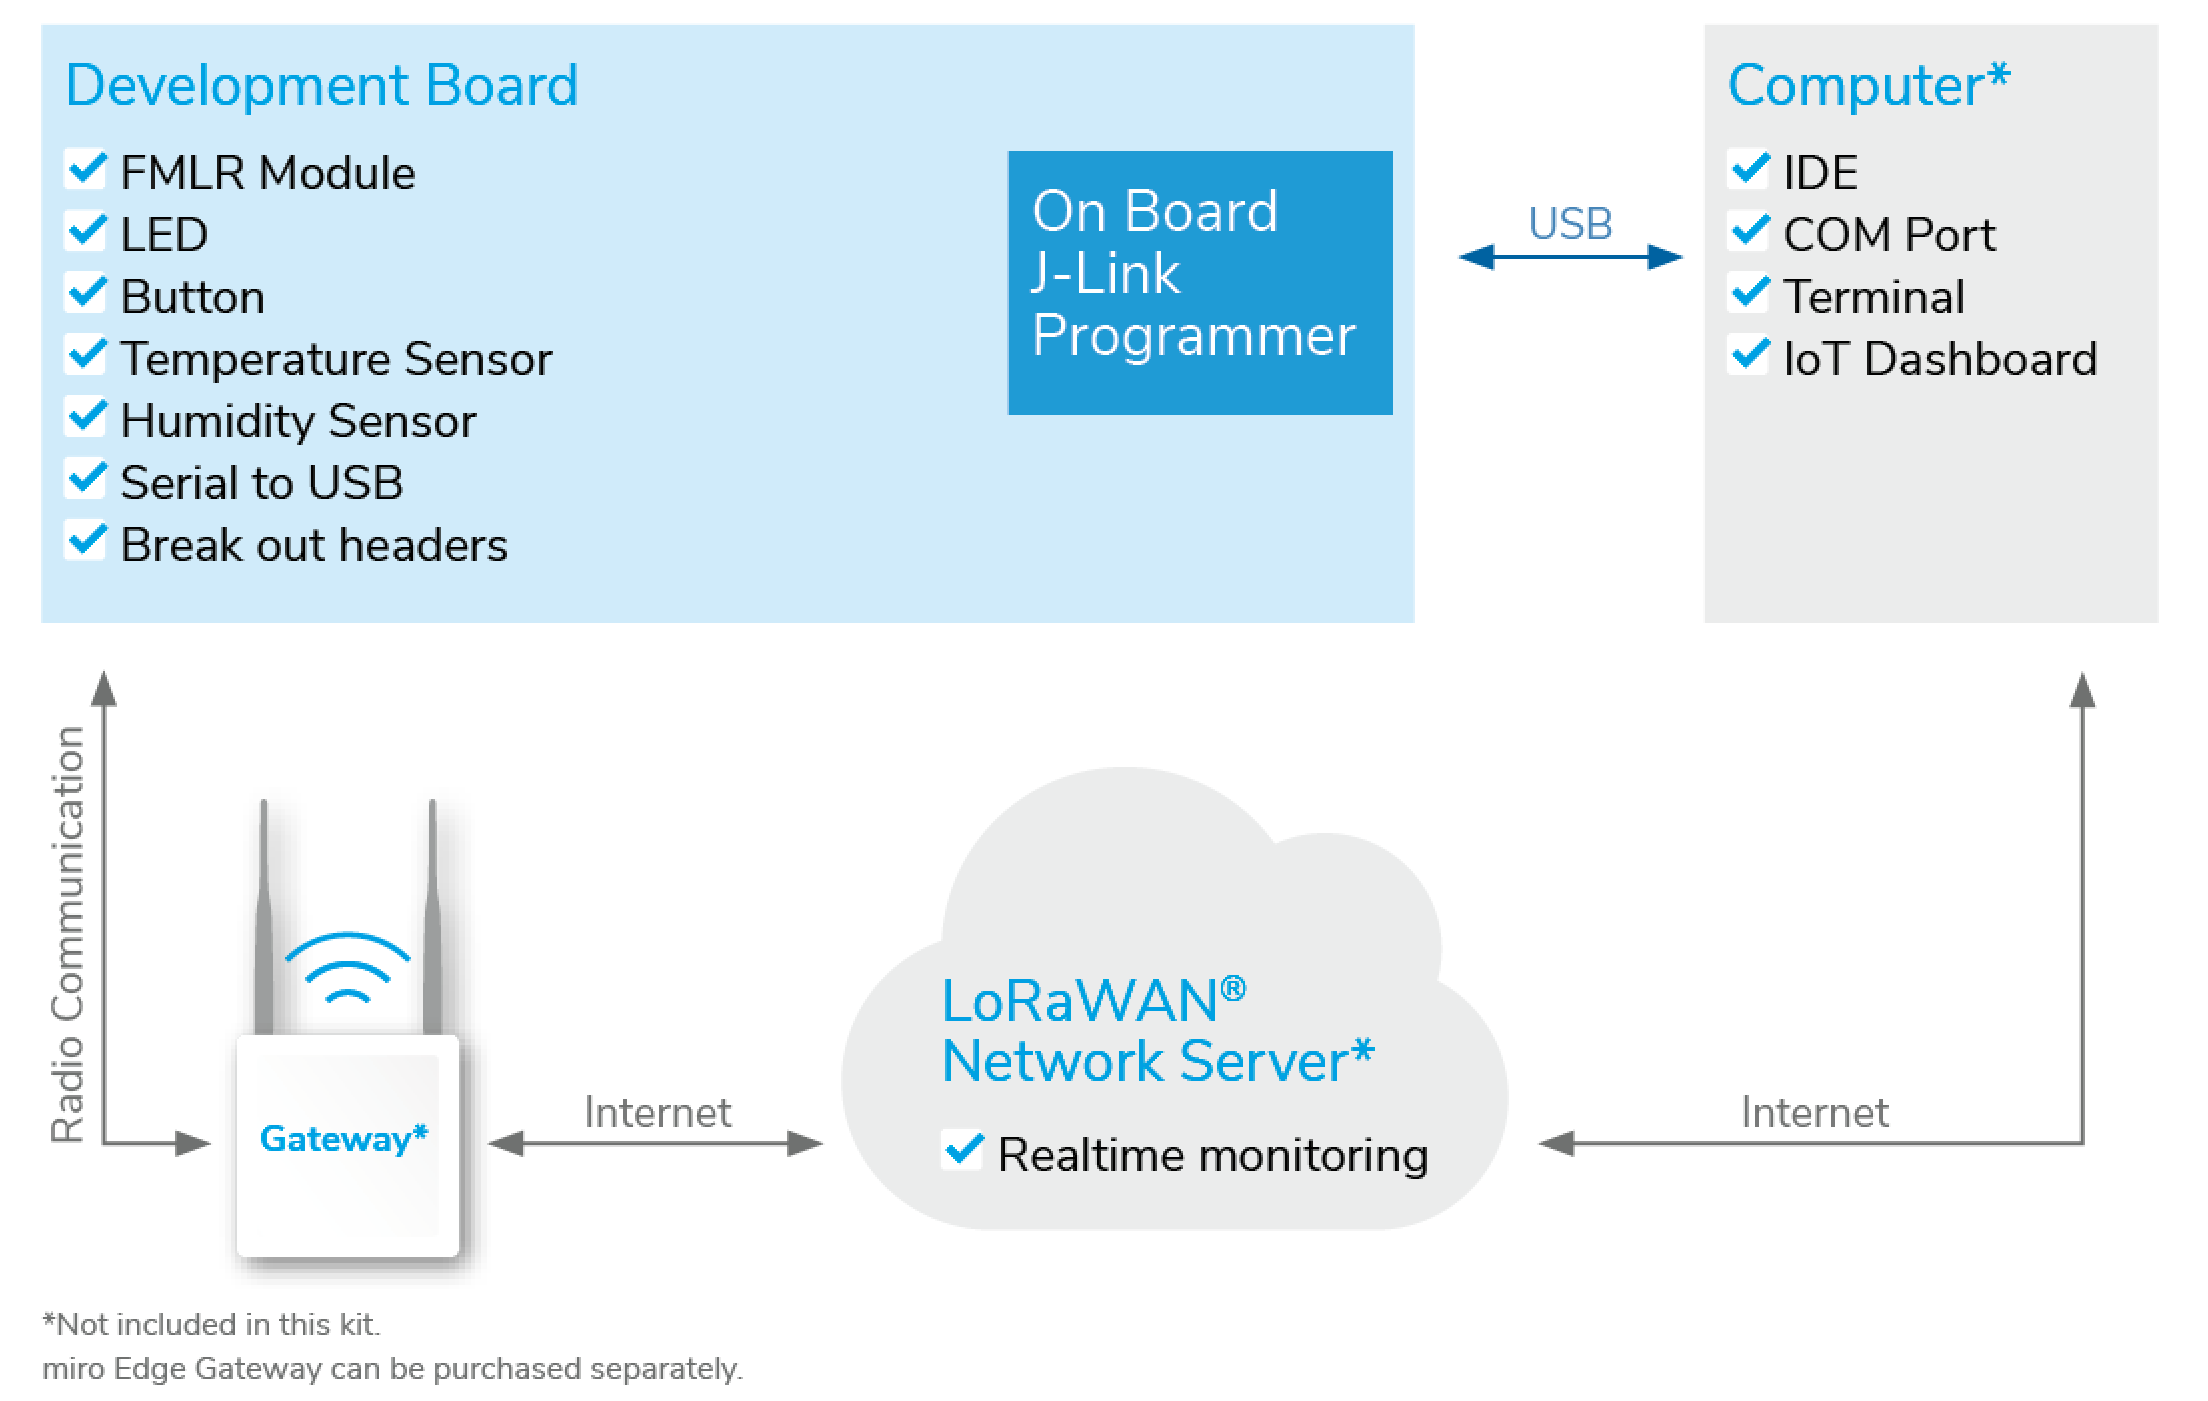
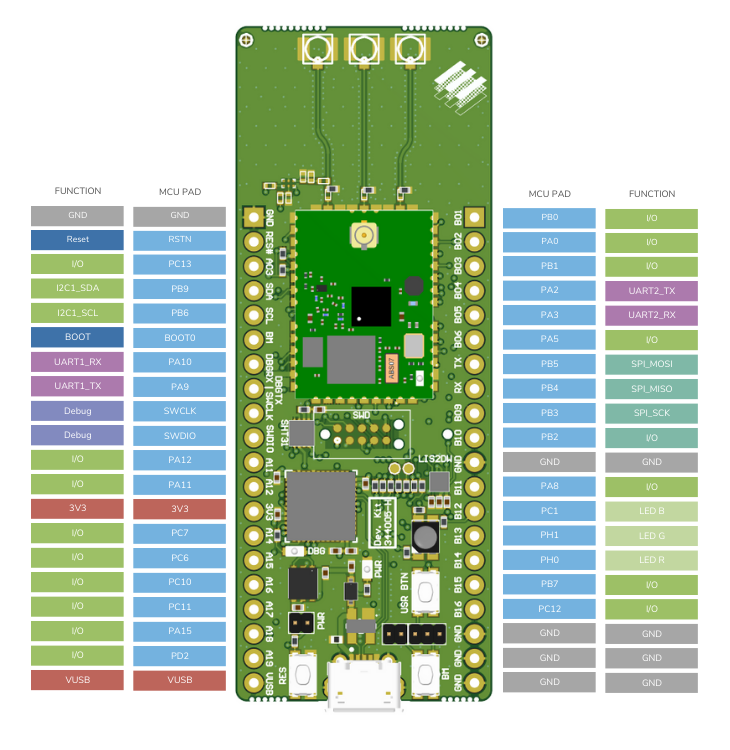
Development board with on-board j-link debugger
-
LoRa antenna with U.FL connector
-
USB Cable
2. Connecting
-
Development board with the USB cable to PC (Power and virtual COM port)
-
Antennas to development board
3. Developing
The development board comes with pre-loaded Firmware with the following features:
-
Blinking RGB LED at start-up
-
Reading sensor (temperature and humidity)
-
Joining over LoRaWAN
-
Periodic sensor read-out and transmit over LoRaWAN ® Follow the steps below to develop your own application :=)
5. Access the serial port of the EVK
In order to view the debugging output of the FMLR Module, you can use your preferred terminal application. (example: https://sourceforge.net/projects/y-a-terminal/)
Use the following setting:
| setting | value |
|---|---|
baud-rate |
115200 |
data-bits |
8 |
parity |
even |
stop-bits |
1 |
flow control |
none |
You can now see the debug output of the pre-installed application. Now let’s develop your own LoRaWAN® application…
6. LoRa Basics Modem LBM
Semtech developped LoRa Basics Modem (https://github.com/Lora-net/SWL2001) for the STM32L4 micro controller. Miromico ported the LBM to the EVK with the FMLR module with the STML071 micro controller.
7. Working with WSL (Windows Subsystem for Linux)
Use your IDE (e.g. Eclipse or VS-Code) for editing the code and use the WSL console to compile the code. WSL is mounting your windows drive(s) in /mnt. Your windows user directory is therefore accessible from WSL at /mnt/c/Users/<yourwinuser>. To avoid line ending and other issues (such as case sensitive file names), it is recommended to do important git operations such as checkout and commits directly from within WSL. Working with windows based Git tools does work, but extra care is needed.
8. Install WSL "Ubuntu"
-
Install "Ubuntu 22.04.1 LTS" from the Windows Store
-
Install packages: $ sudo apk add gcc-arm-none-eabi
9. Writing your own code
-
Find repository: https://gitlab.com/fmlr/lora-bascis-modem/lbm_fmlr_evk/-/tree/main/
-
Clone repository: git clone git@gitlab.com:fmlr/lora-bascis-modem/lbm_fmlr_evk.git
-
Change directory: $ cd lbm_fmlr_evk
-
Modify Makefile defining your hardware. See Readme.md file in the git repository.
-
Build target: $ make
10. Downloading using J-Link
This example uses J-Link (https://www.segger.com/downloads/jlink/ ) under Windows:
-
Connect the DevBoard to the Debugger Probe. Note you can leave the USB cable connected
-
Start J-Flash Lite
-
Choose Device "STM32L451RE", SWD, 4000kHz and click "OK"
-
Choose your application hex file and click "Program Device" (build folder)
11. Comissioning your Device
In LoRaWAN® a device needs to be identified:
-
DevEUI: The Devices Extended Unique Identifier
-
JoinEUI (Or AppKey): links the device to back-end-application
-
NwKey: security key known by the the device and the back-end to encode/decode the messages.
In the LoRa Basics Modem (LBM) Stack the keys are hard coded in the settings.c file in the bsp_l0 folder. In the Miromico DevBoard comes with a preconfigured deveui and keys. The DevEUI is printed on the backside of the board. The keys can be retrieved from Miromico’s credentials database: https://deveui.miromico.ch/uuid Instructions can be found here: https://docs.miromico.ch/deveui/index.html
12. Using a LoRaWAN® network
In order to receive the data from the dev-board over LoRaWAN ® you need:
-
A gateway (e.g. miroEdge)
-
LNS (LoRa Network Server): e.g. Loriot.io or TTI (The Things Industry)
-
Loriot: (https://www.loriot.io/)
-
-
Front-End or Dashboard.
More links:
-
LoRaWAN: (https://miromico.ch/lorawan)
