miro
Evaluation Kit for STM32WLE5
P/N: DEV-FMLR-STEVK7
Evaluation Kit Quick Start Guide
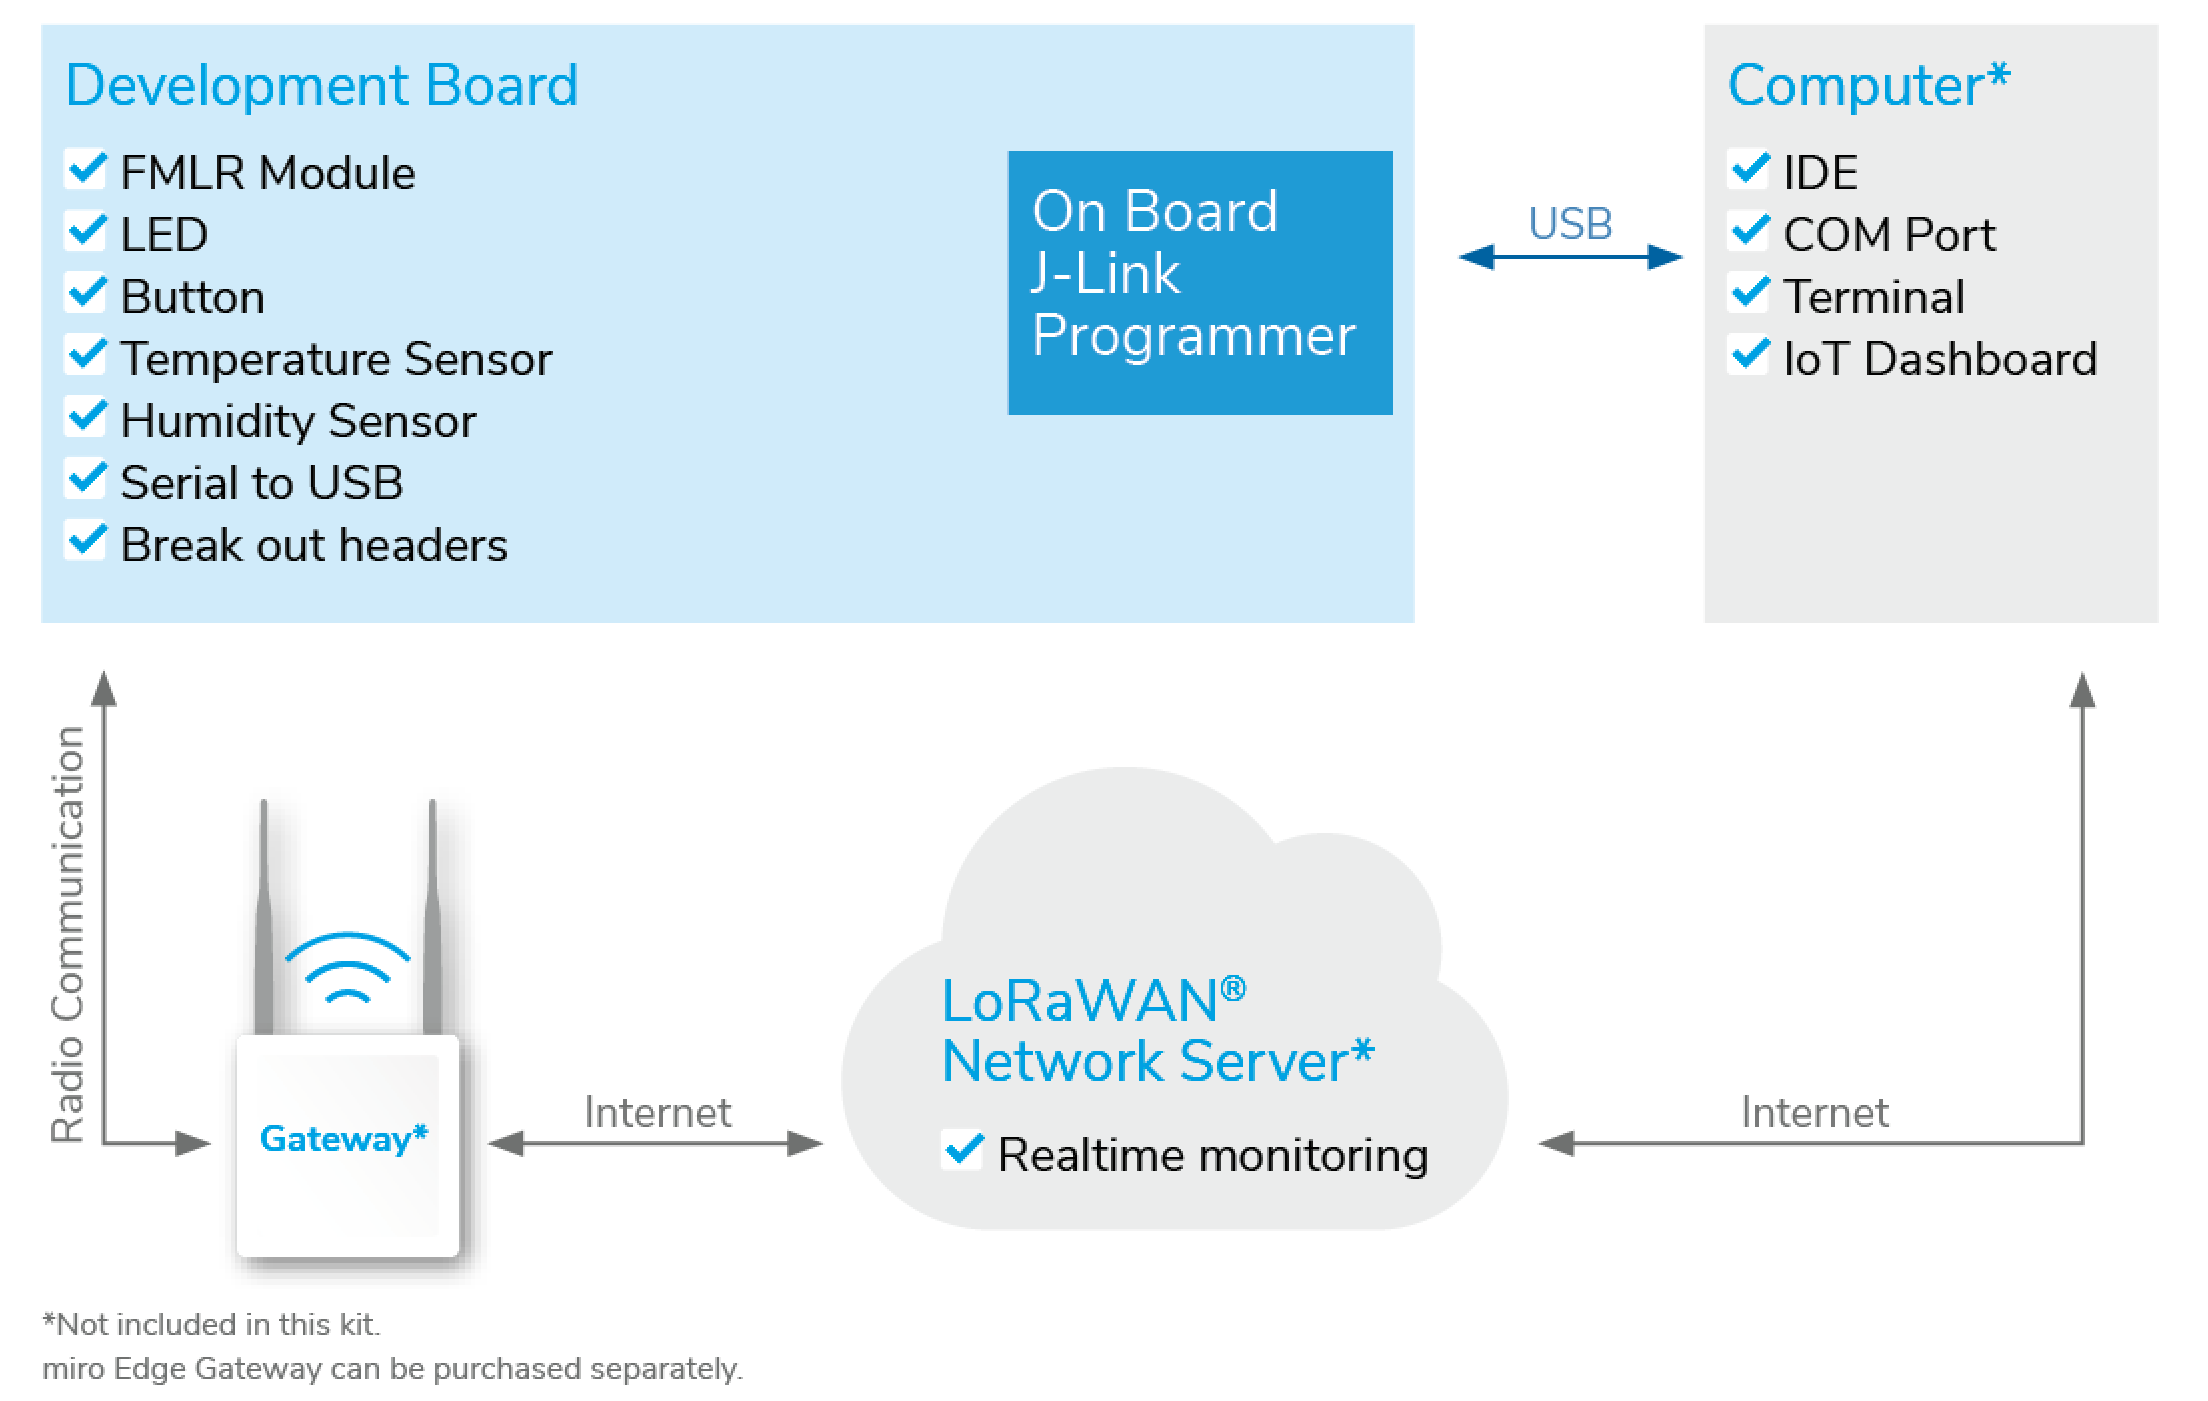
This document provides a step-by-step guide on how to use this board with LoRaWAN®
1. Unboxing
-
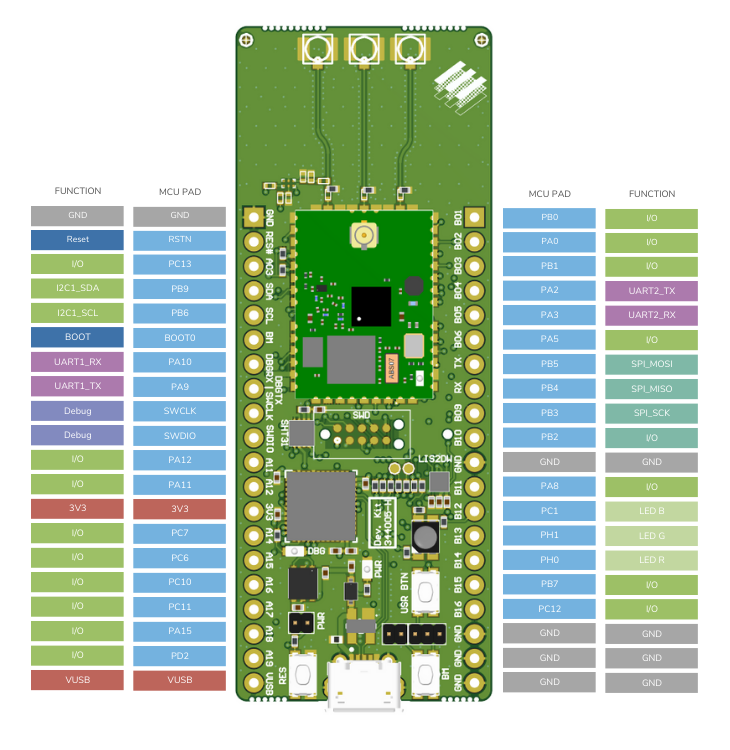
Development board with on-board j-link debugger
-
LoRa antenna with U.FL connector
-
USB Cable
2. Connecting
-
Development board with the USB cable to PC (Power and virtual COM port)
-
Antennas to development board
3. Developing
The development board comes with pre-loaded Firmware with the following features:
-
Blinking RGB LED at start-up
-
Reading sensor (temperature and humidity)
-
Joining over LoRaWAN
-
Periodic sensor read-out and transmit over LoRaWAN ® Follow the steps below to develop your own application :=)
5. Access the serial port of the EVK
In order to view the debugging output of the FMLR Module, you can use your preferred terminal application. (example: https://sourceforge.net/projects/y-a-terminal/)
Use the following setting:
| setting | value |
|---|---|
baud-rate |
115200 |
data-bits |
8 |
parity |
even |
stop-bits |
1 |
flow control |
none |
You can now see the debug output of the pre-installed application. Now let’s develop your own LoRaWAN® application…
6. ST Microelectronics CubeMX example application for CubeIDE
6.1. Preparation
-
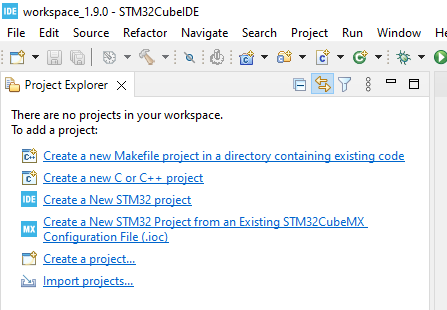
Use STM’s CubeIDE (https://www.st.com/en/development-tools/stm32cubeide.html) to develop your own FW application.
-
Miromico made this for you and provides the following repository: https://gitlab.com/fmlr/fmlr-devboard-wle5
-
Clone the repository: git clone git@gitlab.com:fmlr/fmlr-devboard-wle5.git
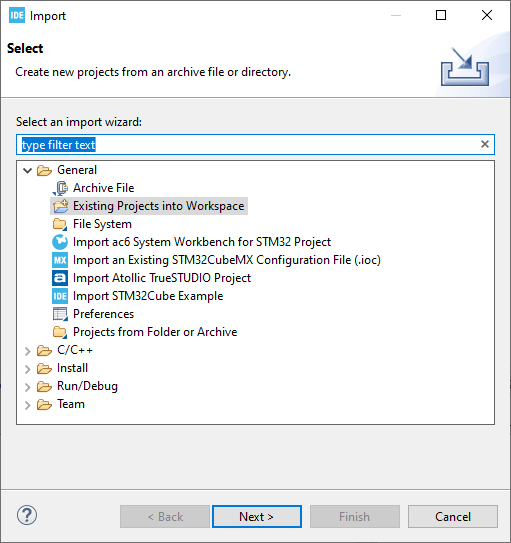
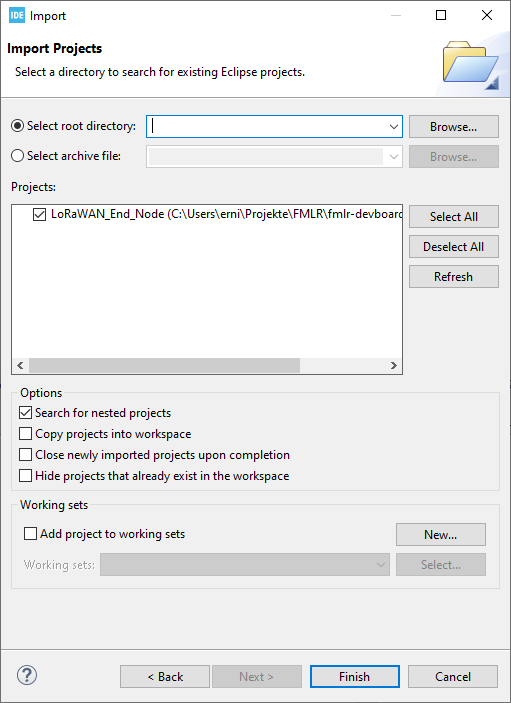
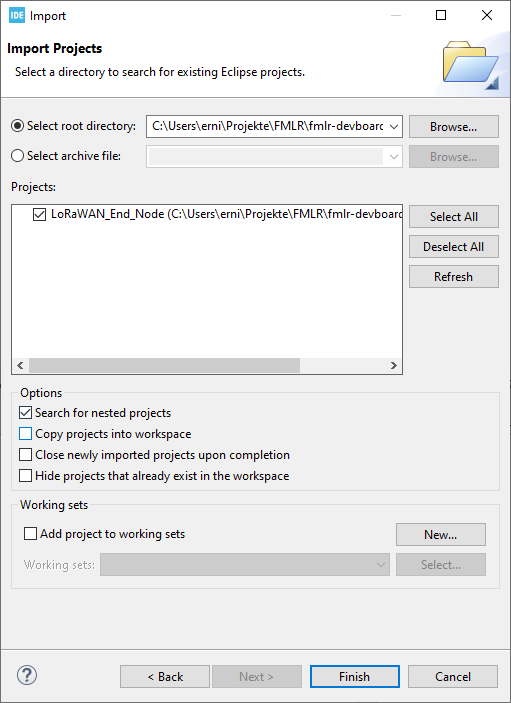
6.2. Import project
6.3. File tree
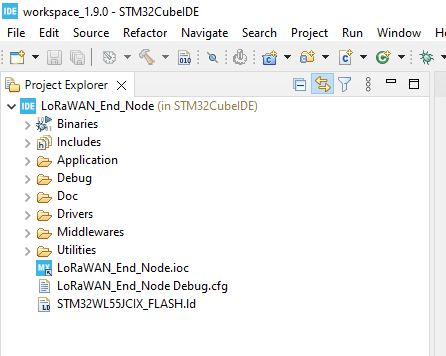
The file tree of your project should look like this:
6.4. Configure the post build step
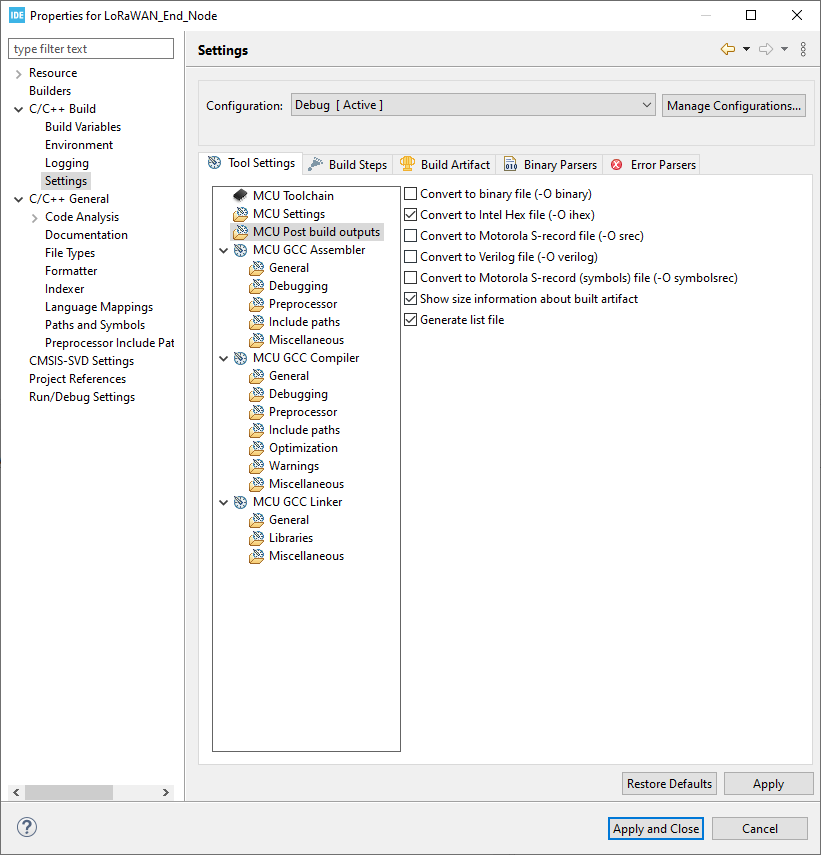
You can configure the project to build a hex file.
6.5. Build Debug. This will provide a hex file
Press the below button shown button to start the debug build. This builds for you the hex file.
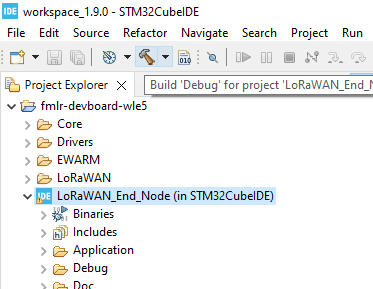
-
Optionally use STM’s CubeMX (https://www.st.com/content/st_com/en/products/development-tools/software-development-tools/stm32-software-development-tools/stm32-configurators-and-code-generators/stm32cubemx.html) to make a FW example based on your own HW.
7. Downloading using J-Link
This example uses J-Link (https://www.segger.com/downloads/jlink/ ) under Windows:
-
Connect the DevBoard to the Debugger Probe. Note you can leave the USB cable connected
-
Start J-Flash Lite
-
Choose Device "STM32WLE5", SWD, 4000kHz and click "OK"
-
Choose your application hex file and click "Program Device" (fmlr-devboard-wle5\STM32CubeIDE\Debug\LoRaWAN_End-Node.hex)
8. Comissioning your Device
In LoRaWAN® a device needs to be identified:
-
DevEUI: The Devices Extended Unique Identifier
-
JoinEUI (Or AppKey): links the device to back-end-application
-
NwKey: security key known by the the device and the back-end to encode/decode the messages.
In this example the DevEUI and the keys are hard coded. The development board comes with a DevEUI which can be found on the sticker on back-side.
9. Using a LoRaWAN® network
In order to receive the data from the dev-board over LoRaWAN ® you need:
-
A gateway (e.g. miroEdge)
-
LNS (LoRa Network Server): e.g. Loriot.io or TTI (The Things Industry)
-
Loriot: (https://www.loriot.io/)
-
-
Front-End or Dashboard.
More links:
-
LoRaWAN: (https://miromico.ch/lorawan)
-
MioTy: (https://miromico.ch/mioty-de)
